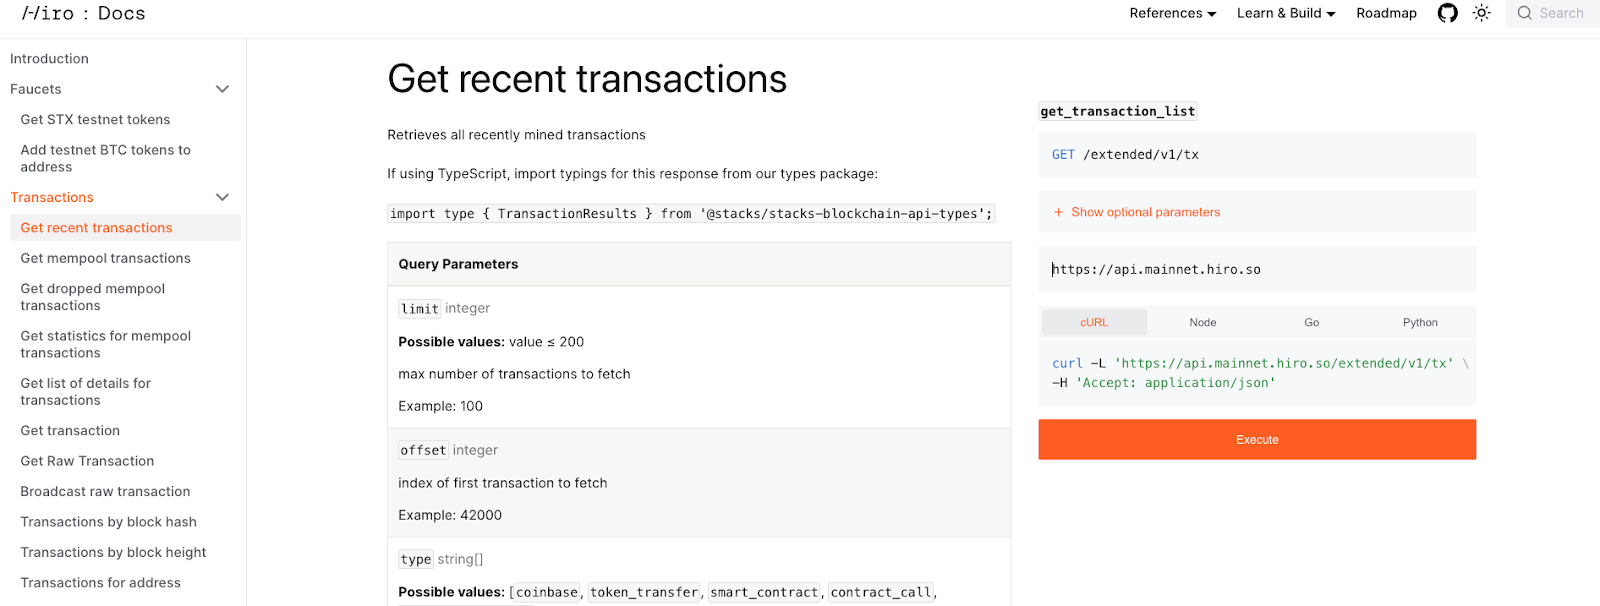
This feature generates language-specific client code allowing developers to seamlessly integrate API requests into their applications. With this new addition, we aim to streamline code development and accelerate the shipping process, all while providing a seamless and convenient user experience.
We’ve rolled out this feature for all of our APIs, including:
This feature empowers developers to make real API requests directly from the documentation and receive live responses in real-time.

We use the site Docusaurus for Hiro documentation, and this demo panel is one of their many great out-of-the-box plugins. This new feature comes with numerous benefits for you, including:
Auto-Generated Language-Specific Client Code
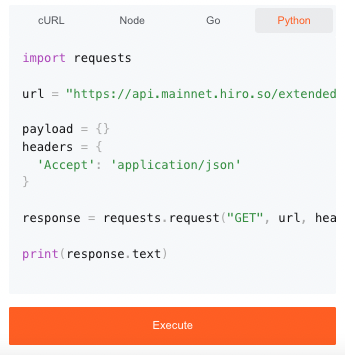
Let this feature handle the heavy lifting for you. It automatically generates client code in the programming language of your choice (cURL, Python, Node, or Go), saving time and effort.

Efficient Error Handling
Users can observe how the API responds to different inputs directly in docs, allowing for better error handling and troubleshooting in a controlled environment.

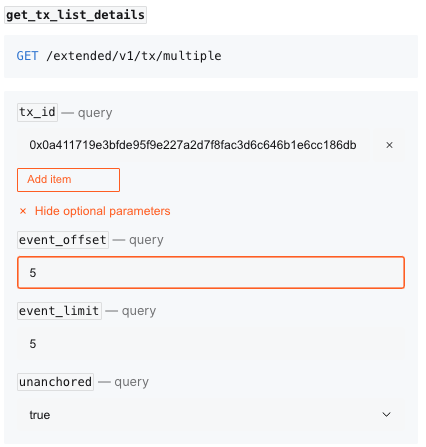
Seamless Experimentation with Query and Optional Parameters
This demo panel makes it incredibly easy to experiment with different options and query parameters for specific endpoints. Say goodbye to manual trial and error in the terminal. Now, you can fine-tune your queries directly in documentation, speeding up the development process.

Select Network
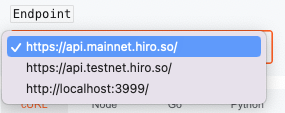
As part of these parameters, you can also easily toggle between various networks, be it your local device, testnet, or mainnet.

Step by Step Walkthrough
Using this new feature is easy and efficient. You can use the following steps to start building:
- Navigate to the official API documentation at **https://docs.hiro.so/stacks/api**.
- Explore the documentation to identify the desired endpoints and their corresponding HTTP methods.
- For endpoints requiring input data, find sample request payloads or parameters and fill in the required data.
- Click the Execute button associated with your chosen endpoint to trigger the API request.
- Review the real-time response on the same page, including the HTTP status code and data in JSON format.
- Modify input data to experiment with different scenarios.
Example Walkthrough
This section walks you through this demo panel with an example API endpoint that retrieves a list of details for transactions for a given transaction ID or a list of transaction ID’s. Follow the steps below:
- Navigate to the API documentation page to use this feature.
- To the right of the API documentation, you’ll see that the endpoint is auto-populated in the endpoint field.
- Next, in the Query parameters section, use the transaction id for the field tx_id to pass it as a query parameter. You can find an example tx_id in docs that you can use directly in the demo panel.
- You can expand the Show optional parameters section to view the optional parameters available. Note that the parameters are already populated, so only the value can be entered in the respective fields.
- You can choose a network to reach the endpoint between localhost, testnet and mainnet.
- You can explore the client-generated code in different languages cURL, Node, Go, Python and then select Execute.
- If the tx_id is valid, you’ll see the output with a list of transactions below:
If the tx_id is invalid, you’ll see an error like this:
Let Us Know What You Think
Our goal is to help you ship faster, and we hope this new feature makes Hiro docs a more interactive experience that helps you learn more quickly. You can check out this new feature in the reference docs for our APIs here:
If you're a visual learner, you can watch Lavanya demo this new feature in docs on our YouTube channel:
We'd love to hear your feedback on this feature and on docs in general. Please reach out to us on the hiro-documentation channel on Discord or file a GitHub issue.


